
Microsoft was pretty quiet about its release of the Request Files feature in OneDrive. I’m not sure why that is, because it’s really great. If you’re still using FTP or are paying for a third-party solution, you’ll want to check this out as an alternative. While I’ve mentioned FTP, let’s take a moment of silence for the death of one of the first protocols of the Internet. FTP was invented back when the Internet was a private venture between a few universities and government. It was never built for the security or compliance issues we have today.
OneDrive’s Request Files feature builds on the existing file-sharing capability by adding features that keep the data segregated so your customers don’t see each other’s files. It also identifies who uploaded the file, notifies you of received files, and allows you to add policy and automation to make it a truly enterprise-worthy solution. Since Office 365 subscribers already own this tool its usage is likely to grow rapidly.
Let’s look at how it works and an example of security, policy, and automation that you might consider adding to the base feature set.
Configure OneDrive for Business
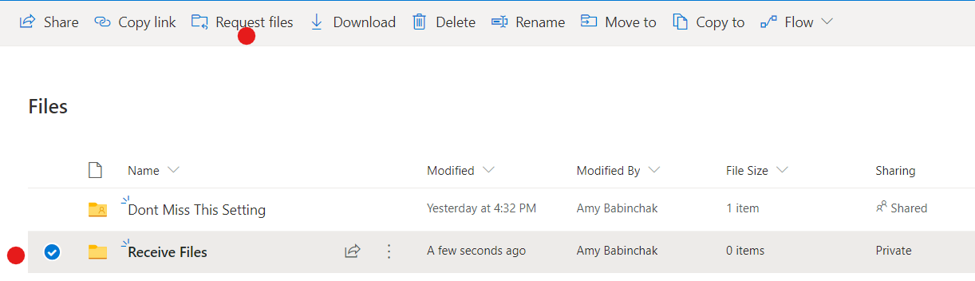
Go to your OneDrive for Business website. Create a new folder for receiving files. Below you can see that I’ve created one called, rather obviously, Receive Files. Now select that folder and then press the Request files button on the toolbar. Note that the Request file button doesn’t appear until you select the folder.
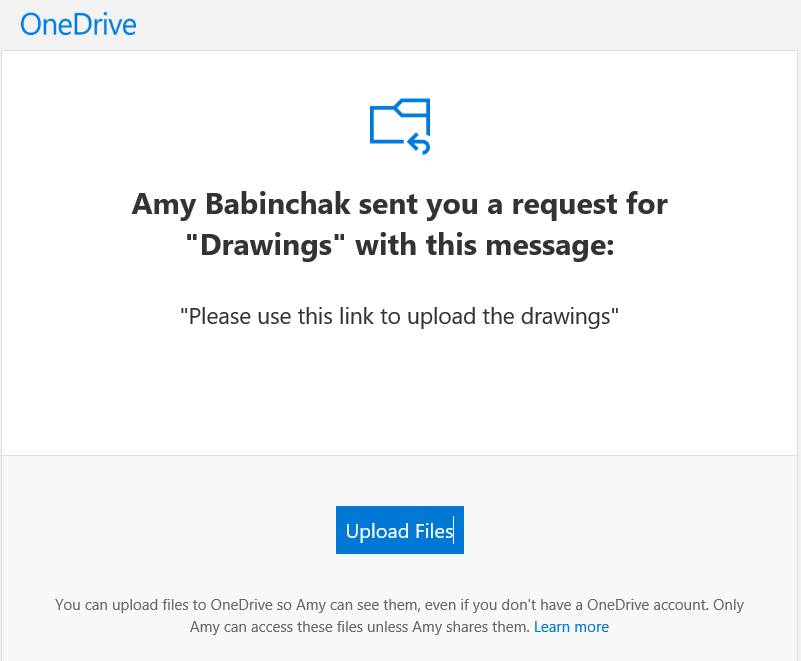
When you press the “Request files” button, a new dialog box opens. In this one, you can press the Copy link button to copy the link that people will use to upload their files. This link is permanent, so you’ll want to save that link and just email it to any new customer that needs to send you files.
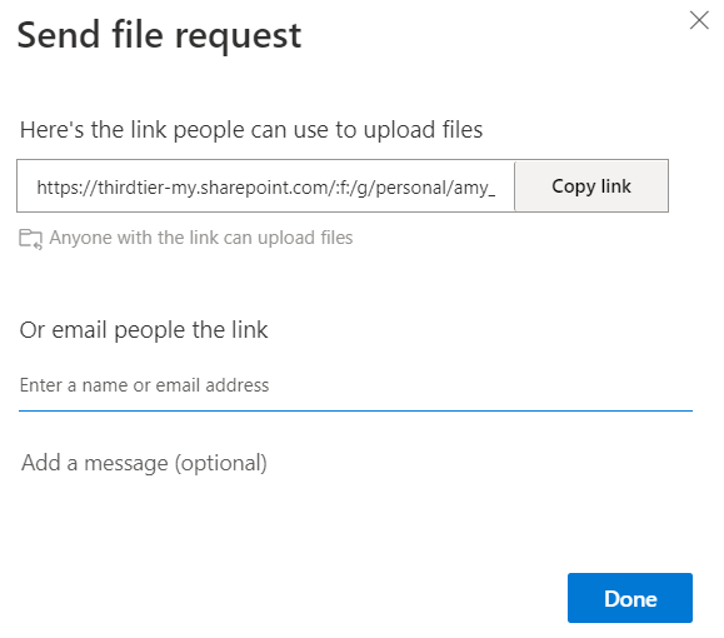
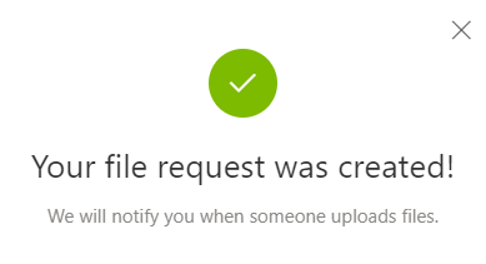
Alternatively, you can type in their email address and send that email directly from this dialog box. Press Done to send the email.
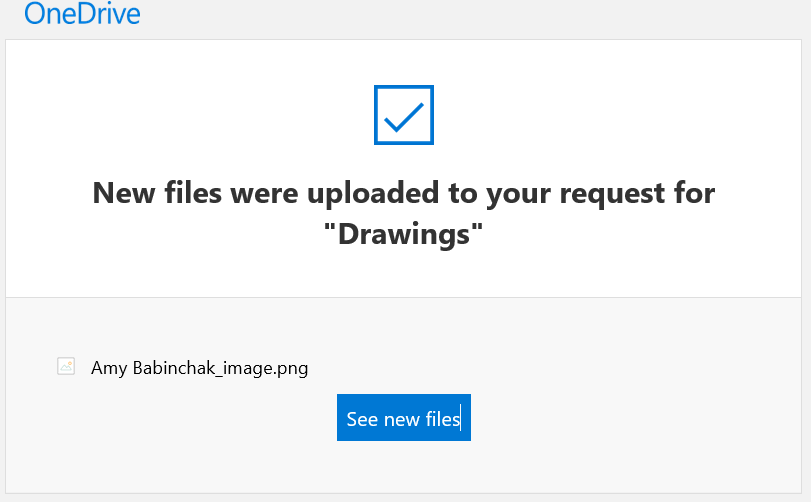
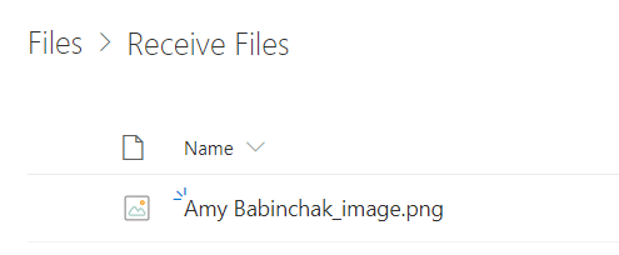
Notice this lovely dialog box and especially the bottom text that you will receive a notification via email when your customer has uploaded a file. That’s a great feature. Below is what that notification looks like. Not only does it let you know that there are new files, but notice that the name of the file has been altered to prepend the name of the person that uploaded the file.
On the customer end of things, if you choose to email them directly here’s what that email will look like. I have not found that this email can be customized or branded yet. I was surprised that it didn’t respect the existing corporate branding in Azure. In today’s phishing-filled email world, that is unfortunate. If a reader has discovered the solution or found that Microsoft has added this feature since this writing, please share it in the comments.
Whether you’ve emailed from the dialog box or shared the link when your client uploads a file they will never do so anonymously. They will either logon or simply provide their first and last name. This will give you some indication that the upload came legitimately from your client and is expected.
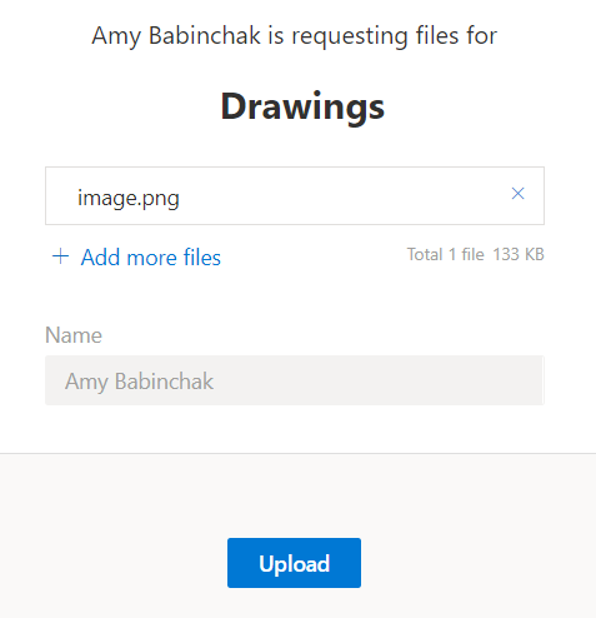
Above, I’ve requested files from myself so my name is already entered but ordinarily, that Name field would be blank and required to contain text before the files can be uploaded.
Now when I look in my folder for the file, it has my name as a prefix to the file name, helping me identify which client the file belongs to. If you’re close to your customers then this will help you verify that the files are legitimate, but we can go a step further in our security stance.
Securing received files
You’d be smart to scan any files you receive before opening them. It’s the normal thing to do these days.
For scanning, I recommend turning on the Advanced Threat Protection (ATP) feature in Office 365 so that it happens automatically when the file is uploaded. This setting is found in Office 365 under the Threat Protection settings when configuring your Safe Attachments policy. Many people miss this little checkbox. It’s located at the top of the policy page. You’ll find this here or the long way by browsing down through, Microsoft Admin/Security/Threat Management/Policy/Safe Attachments. With this setting in place, Microsoft ATP will scan the file as soon as it appears. You won’t be able to open it until that scan is complete, but a moment’s wait is worthwhile to avoid a nasty computer infection.

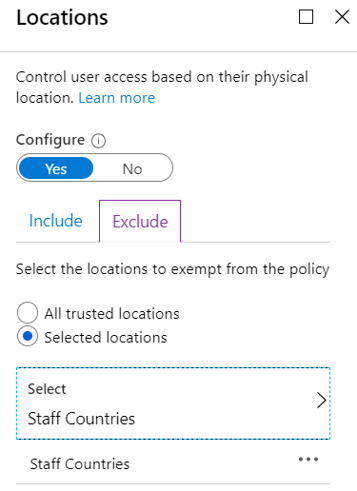
What if we want to go further in securing the files that get uploaded to this folder? Well, you can limit the upload capability to only the user you receive the email from, you can force your customer to login and use MFA, but those things are likely to be annoying. In security, we’re always walking that line between functionality and secure. Registering MFA in your domain and using it will likely cause the user and customer to seek another solution. But there is something that we can do. We can limit the locations from where we want to receive files. This could be a set of IP addresses or it could be countries. This is an advanced feature and requires some additional licensing to access but we can create a policy for SharePoint that limits the location that someone has to be in to send us a file.
If we say that our customers are located in the United State only, then we’ll create a policy to only allow guest and external users that are from the United States access to SharePoint (which is where OneDrive resides) files that originate from the U.S. And we’ll block all others. While this policy affects all of OneDrive and SharePoint, it’s not a bad policy to have. You will need to have a license that includes Conditional Access in Office 365 to achieve this level of security. This license can be added as a stand-alone Azure AD P1 or any of the Microsoft 365 varieties.
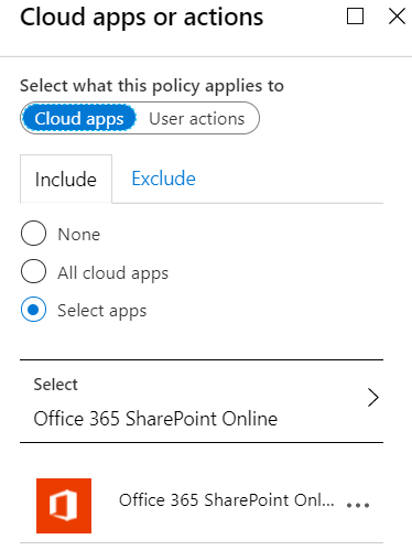
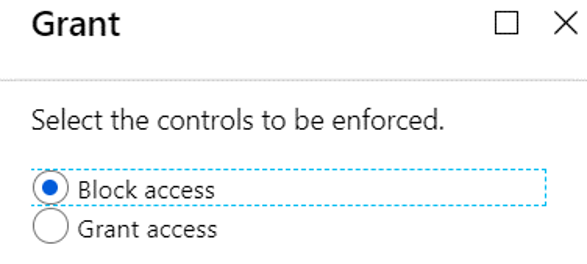
Creating a policy for SharePoint allowed locations is shown below. From left to right, Select All guest and external users as your target group, then select Office 365 SharePoint Online as the app we want this control applied to, then under locations to Exclude from this rule select an Allowed locations group, then finally under Grant choose to Block access. What we’ve done here is to say that we want to block access to SharePoint by guests and external users unless they are located in certain countries. It’s not a bad policy to have in place even if you aren’t planning to use Request Files.

Keeping it clean
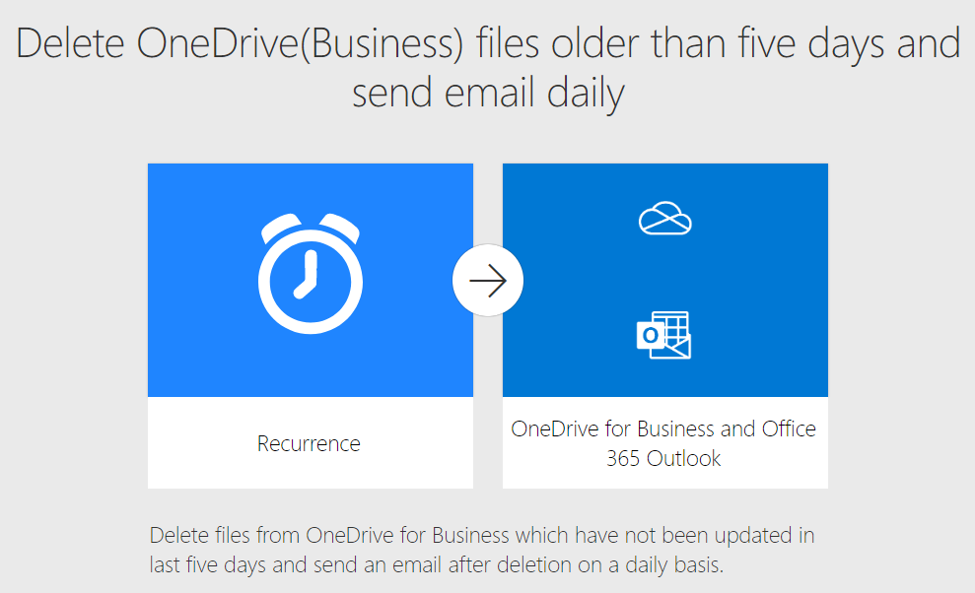
If you’re like my clients, then keeping the Receive Files folder clean is a habit that seems difficult to adopt, so for them, I create an expiration policy on this folder so that the files are automatically deleted after a fixed number of days. This will keep the folder from getting choked with files over time. Back when FTP was king, cleaning out the FTP folder was someone’s job. It’s time we gave that meaningless task to a robot.
Here we can turn to Power Automate to help us. There’s a ready-made template that I’ve pictured below. Don’t worry about the five-day thing. You can change the time frame. The point here is that we can automate the cleanup process and not take up any staff time for the task.
Without getting into excruciating detail, this template is pretty easy to use. First, it lists the files, then it checks the file date against the condition, then if there are any matches it deletes them and sends you an email letting you know that it has deleted some files. To edit this template, expand the Condition and edit the five-day period to the one that suits you. As pictured, it is set to 30 days.
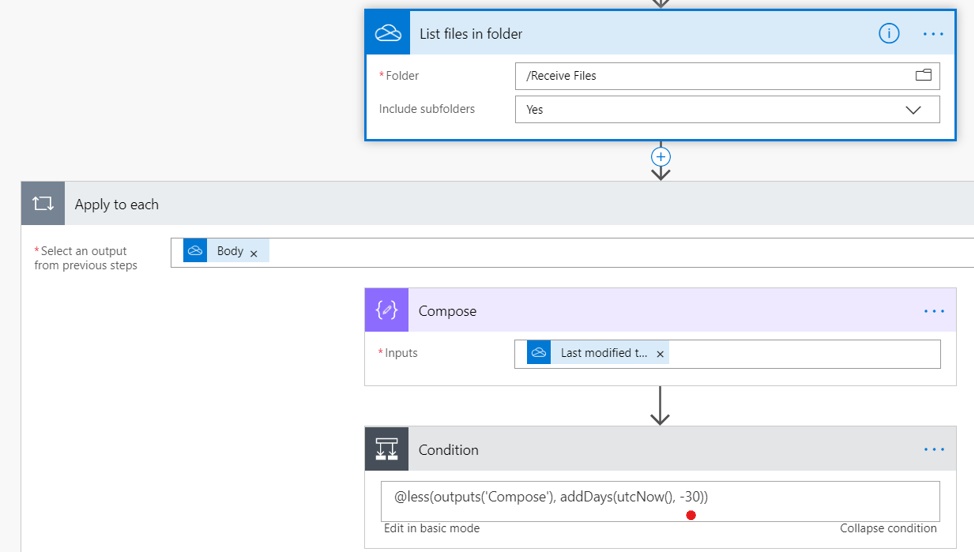
Then choose the folder that you’d like to have cleaned automatically. Finally, after this point in the template, there is an email where you can compose the notification that sends when a file has been deleted.
Don’t worry about losing these files. Files that are deleted go into a recycle bin and can be retrieved for 30 days, then into a secondary bin where they can be retrieved for another 90 days. After that, you’ll need a third-party backup solution to recover them.
We now have a really nice feature-rich solution for receiving files, keeping data safe, and automating the cleanup task. It’s been a long time coming.
Originally posted in 2019 this popular post was migrated over from our previous blog
Make your IT business better than the competition. Help for IT Pros, TechYourBooks, Super Secret News, Women in IT Scholarship program, Ransomware Prevention Kit, 365 Security kit and more. https://www.thirdtier.net


