
One of the challenges of creating solutions for clients is how to move them between tenants. After all, if we have a great solution that we want to use as a template for another client and we can copy it over there, we could save ourselves a lot of time. So, let’s do it!
Export a Power Automate flow to another tenant
From within the editing screen of your flow, you’ll find the export options in the menu. Choose the .zip option from the Export menu. This will download a .zip file to your computer.

Before we get to that point, we have some information to enter and some choices to make.

As indicated by the red *, the Name field is required. This will be the name of the flow when you import it so make it a descriptive name that you’ll recognize. Optionally, you can enter the environment name and a description of what the flow does and perhaps where it came from.
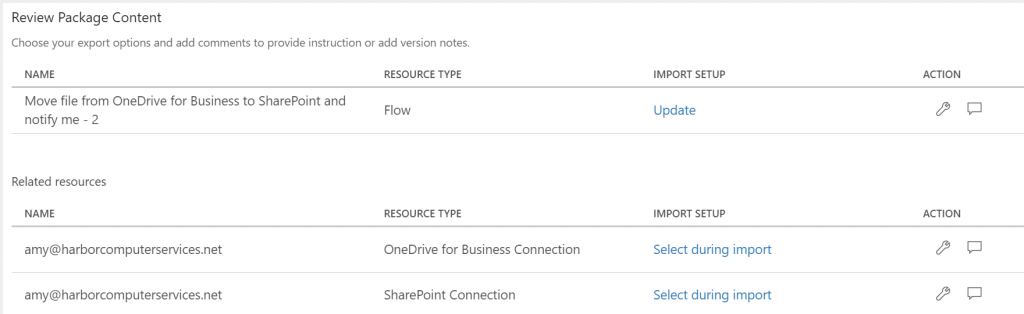
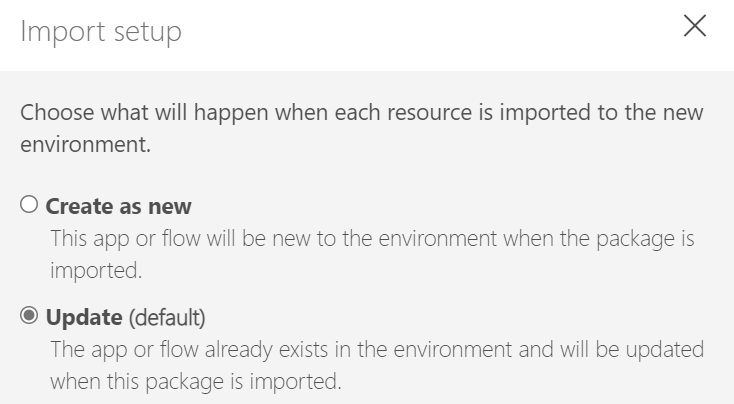
The next thing that we have to do is to let Power Automate know whether this is a new flow or an update to an existing flow. The default setting is to Update an existing flow, but you’ll probably find yourself wanting to import a new flow more often. If that is the case, then click the word Update and then select the radio button for Create a new and press save to make the change.

The next issue are the permissions for the connectors. The default and only setting here is already selected. Upon import you’ll be asked which account you want to use for the required accesses.
Press the Export button to get the .zip file downloaded to your computers download folder. It’ll look very much like the one below. Notice that it’s used the name I entered and also added a string of numbers to the name.

Import to Power Automate
The first step to importing your flow is to log into the receiving tenant as the account that you want to flow to be available for editing in. Recall from our Microsoft Admin: Don’t miss this setting! course that you also want to share the resulting flow with another account as a backup. This will prevent orphaned flows.
Once in Power Automate, click on My flows, then Import.

You’ll be presented with a page that requests the .zip file that we downloaded a moment ago. You’ll find that it’s oddly backwards from how most upload pages work. In this case you’ll press the Update button first, then select the file. When you do the upload begins automatically.

Upon completion of the upload, we’re back to the setup screen where we select the type and permissions. The green check indicates a good setting. The red indicates ones that needs help.
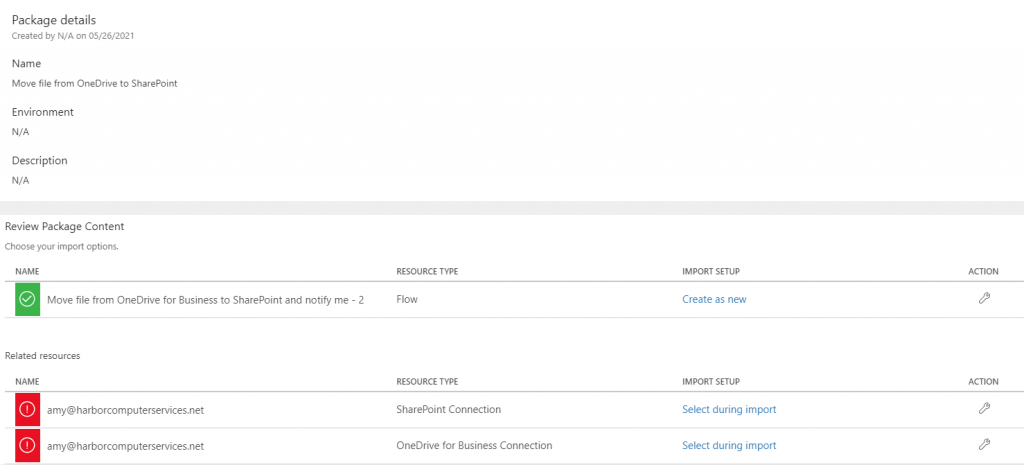
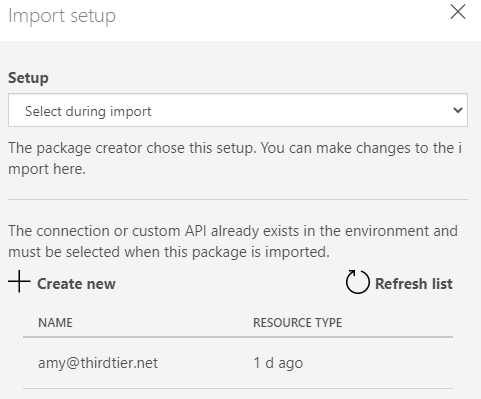
Currently this flow is going to try to use the user accounts from the previous tenant. To update this to an account in the new tenant click on Select during import or the wrench icon. Either will open a side panel where you select to use the account you are logged in as or click the + Create new to select a connector that is already in use in the tenant. These are the only two choices you have.
You’ll need to select an account for each permission required. Once you’ve done that, you won’t get a happy green check, rather you’ll get an ominous black X. Which was worry some the first time I saw it but after you click the Import button at the bottom on the page, they turn into happy green check marks. However, the address displayed doesn’t change. It’s all very confusing. Just don’t worry about it and move along. It’s working.

It takes a minute-ish for the import to complete. It’ll remind you not to navigate away from the page while this is happening.
Now, navigate into My flows and you’ll find the imported flow. It will be in a disabled state. You’ll need to remember to enable it when you’re ready to go live.

You are now ready to begin editing your imported flow.
All we do is support IT professionals. Help for IT Pros, Super Secret News, Security community, MSP Legislation community, EndPoint Security community, kits, papers, MSP training and more. https://www.thirdtier.net Open a ticket and let us help you!


