
When is the last time that a single word changed made a major impact upon someone? It’s rare. I’m going to show you how adding a single word to a user’s profile in Azure Active Directory (Azure AD) can kick off an entire onboarding process and move user add/remove from an IT task into an administrative assistant task.
I’m often asked about how someone goes about reducing their dependence upon RMM tools. It’s not really a secret, but instead is about making full use of available toolsets. Most people aren’t using Azure AD to its fullest extent. Let’s look at how to use Azure AD to onboard a new user, complete with group membership, permission sets and application deployments.
Managing with Azure AD is very different than managing with on-premises AD. In addition, to simply being a repository of users, devices and passwords, it is the protector of identity and access, and it is those features that we’re going leverage for automating the user onboarding procedure.
Step one: Automatically add a user to a department
The automation path that we’re going to follow, triggers off of a field that has been included in a user template for a particular department. I like to use a template because once we’re done configuring this process it transitions onboarding a user from an IT job into an administrative assistant job.
You create a new user template in the Microsoft 365 admin center under the Users menu. Create a template for each department where the department field is pre-filled. If you’d rather not create a user template, then you’ll have to remember to fill in the department field. Everything about the automation process that we’re going to explore in this article is triggered by the department field in the user profile.
Step two: Automatically add members of a department to a group
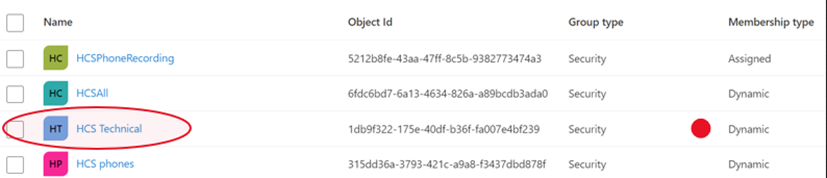
In Azure AD, if we look at groups, my tenant has a lot of groups. One of them is the HCS technical group and here we see that it has a dynamic membership type.
TIP: Adopt a naming convention for groups where the groups you create start with the company initials. Microsoft 365 creates a lot of its own groups and members. Using initials will make it easier to find your groups.
The properties for this group’s membership are that the user is in the technical department and their account is enabled.
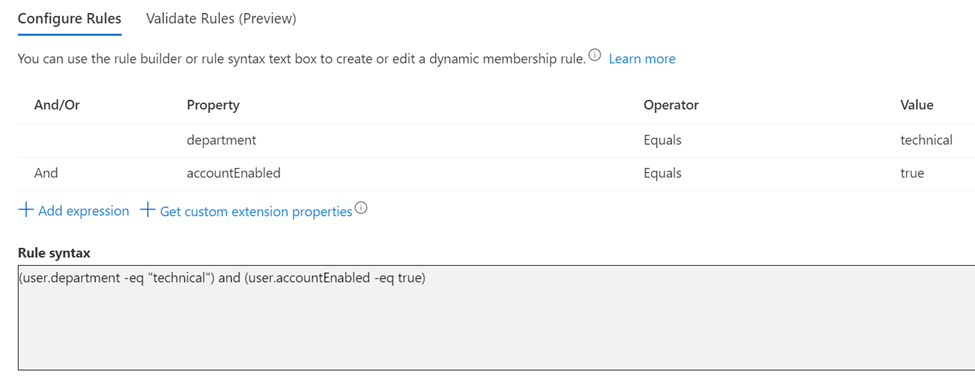
Why do we care if the account is enabled? If their account gets disabled for any reason, then they automatically lose access to this group and all the permissions that it has been assigned. This will be important for rolling back the permissions and membership of the employee when they are no longer employer or should the account become compromised.
Step three: Automatically assign licenses to members of the group
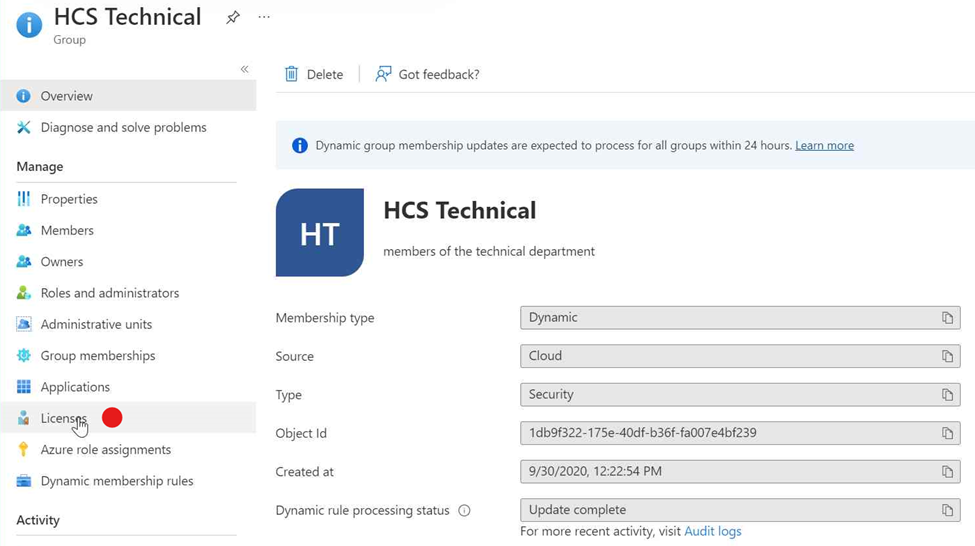
We can automatically assign licenses to the members of the technical group. In Azure AD, click into the Group, then choose the Licenses menu item.
Adding licenses to the group is a simple matter of selecting them, just as you would do in the user portal for an individual. In this case, just click Assignments to add them.
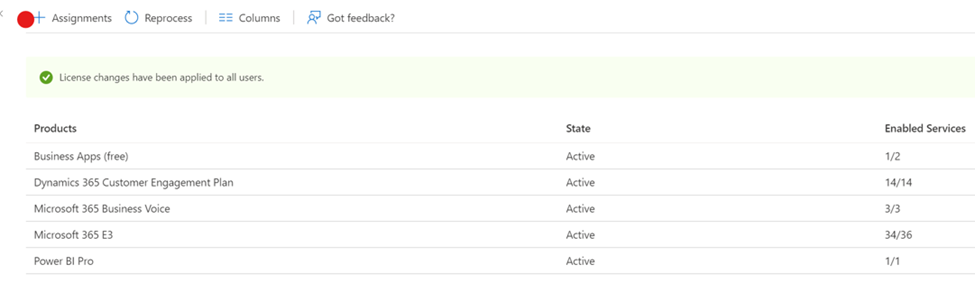
Here we show that five different licenses have been assigned to the group members. We’ve added all of the licenses that are necessary for people in this department to do their job.
When you manage in this way, you’ll notice something different in the Microsoft 365 Admin portal.
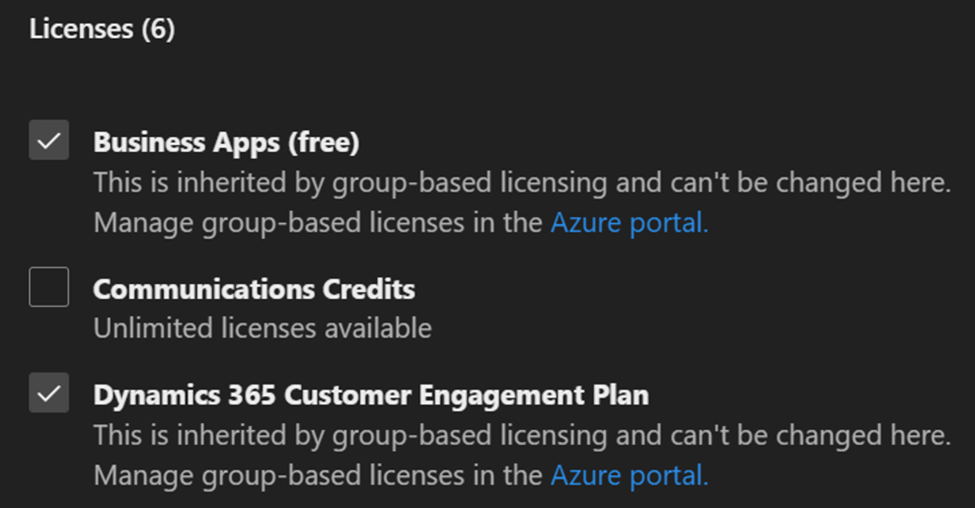
Notice that the license assignments for a user all say that this they are inherited by group-based licensing. The licenses can’t be changed here. They can only be changed at the group level.
In this automation process, the administrator didn’t have to remember to assign licenses to the individual.
A word about licensing. In my practice, our minimum supported license in Microsoft 365 Business Premium (M365BP). M365BP includes Azure AD P1 plus some additional features. If you have Azure AD P1, you’ll be covered to this point. But if you want to go full automation, then you will need Azure AD P2.
Step four: Assign applications
The next item that we can trigger with that single keyword in the department field, is part of Identity Governance. Microsoft recently re-branded it to Microsoft Entra Identity Governance and at the start of the documentation is the best one sentence description of what it does. “It provides you with capabilities to ensure that the right people have the right access to the right resources.” However, to use these features you will need Azure AD P2 licenses.
To setup our application assignments, we can create a catalog and then assign it to an access package and then assign that access package to the technical group which would allow our user to request that package and gain access to everything that it contains. Describing it makes it sound complicated, but it really isn’t.
Here’s how assign applications to the user. In Azure AD, after clicking into the Security menu, choose Identity Governance.
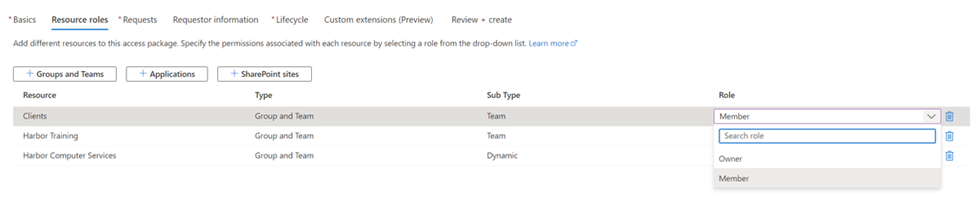
The first step is to create a new catalog of the resources (that’s Azure AD for applications) that we want assigned to the technical department.

In the figure above you can see that we’ve added four resources to our catalog and below you can see what they are and how they were added.
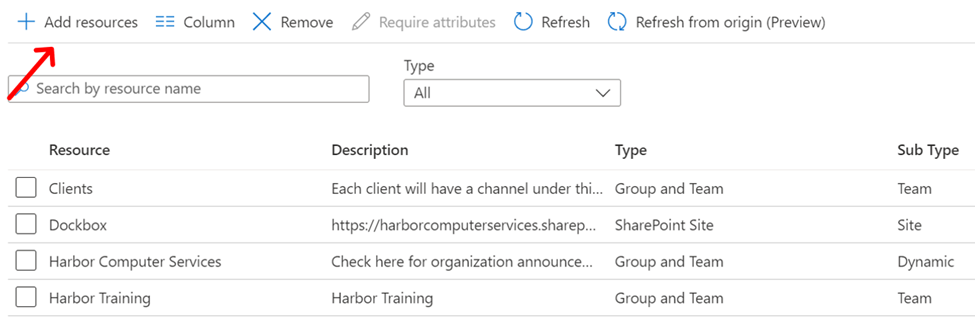
Adding resources into the catalog is as simple as clicking the add resources button and then choosing which ones you want. Now we go back to the menu and this time choose access packages.
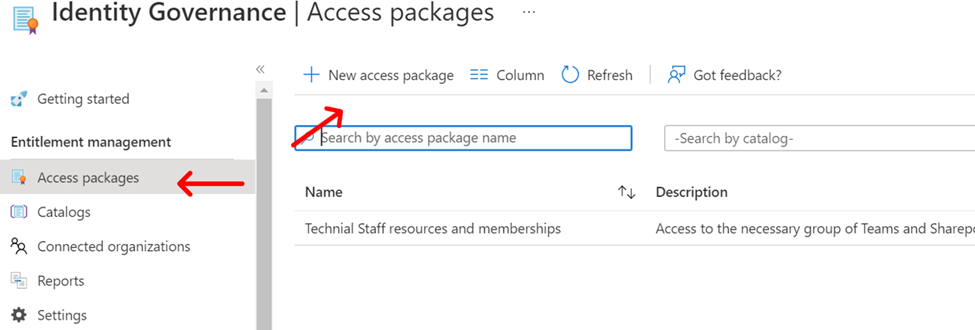
Create a new access package and put the catalog of resources that we just created into it. Creating an access package is going to take you through several steps. This process can be used with great granularity to provide access to resources by Guests and you’ll often hear Microsoft talk about using it that way. Here we are providing it only for known staff members that are part of the department we are creating the automation for.
Our first step is to give the access package a name and select the catalog that we’re going to place within it.

For each resource, if permissions exist then I’m offered the opportunity to set them now.
Now I define who can request this access package. For this group, it only contains people in my directory.
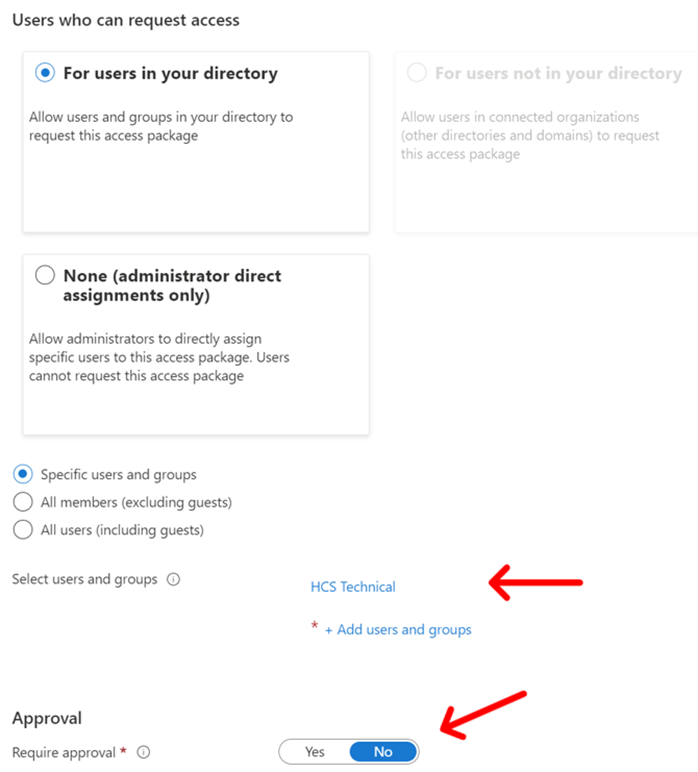
I only want HCS technical group, so I select that option and choose the group. I’m not going to require any approval because this is the basic set that all those people that are members of that group need to have. Following our automation back to the beginning, the only approval they are going to need is to be a member of the technical department. Which, the user template populated for us.
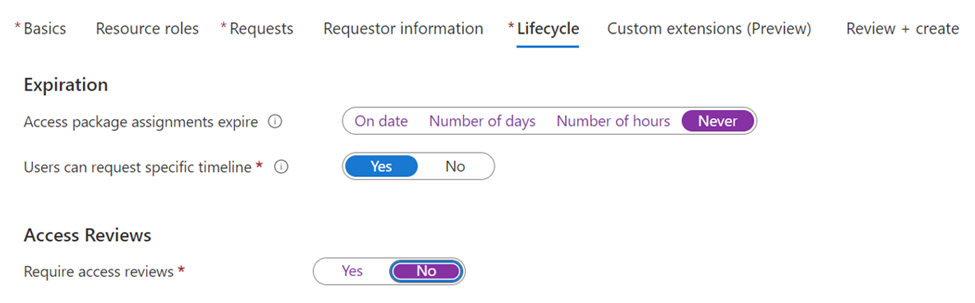
Finally, I define how long someone is going to have access to this access package of resources. Since this is an internal group, I want them to have access as long as they remain in the department and because we’re using department as our trigger word to kick off this automation, we can set it to never expire.
Step five: Send the user an email
When we save the access package, we are presented with a URL for the user to click to activate the resources. At this point in the process, all we must do is send our new user an e-mail with the link to the access package. OK, that is slightly manual. There may be a way to create a Power Automate flow to watch the group for new members and then automatically send them the email. I leave that bit of automation to your imagination or just let your administrative assistant send the email.
Rolling back
There’s another feature to this process. If the user account were to get disabled for any reason or they change departments, they would lose membership to the technical group. A disabled account could occur automatically for a suspected breach or in the event of termination. Departmental changes are commonplace in large corporations. Whatever the case may be, since they no longer qualify for group membership and since everything, we’ve just done is tied to that, they no longer qualify to access any of the licenses or resources that we’ve just provided to them.
Read more about Azure AD in our blog.
All we do is support IT professionals. Microsoft 365 technical assistance, Newsletter, Security community, MSP Legislation community, Intune, Defender and Lighthouse community, Peer groups, Kits, papers, Business consulting and more. https://www.thirdtier.net


